Showing posts with label demo. Show all posts

Moving On Up

We demo'ed most of the upstairs a little while ago but I haven't got around to snapping any photos for you guys to see until now. They aren't very exciting -- but hey, it's progress!

View as you ascend the stairs. Doorway to the left enters into the newer addition of the house.

Upstairs south view. Stove pipe to the right is coming out. Wall to the left of what is remaining of the bathroom.

View of the lower and upper staircases. Attic staircase is coming out along with the entire attic.

The doorway to the left behind the stovepipe will be the new entrance to the bathroom/laundry room. The log room will be the bedroom.

Timber!

Remember this shed that was attached to the house? Well, we are glad to say it is now disassembled and the eyesore is no more!

BEFORE


DEMOLITION

We stripped the salvageable wood off the shed to save for future projects and scrapped the tin roof.


Jeremy prying tin off.

View with tin roof removed. We saved the hand hewed rafter beams to use in the house.

Lee helped us out by pulling nails from the beams.

Check out these cool license plates from 1921-1923 that were patching holes in the roof!

AFTER


You can see the outline on the house of where the siding was put over where the shed was.


Just waiting on a contractor to finish picking up the concrete fill and this project will be complete!

Hacking Away

We were able to get some demo work done on the house this past weekend and I have a few pics to share! It felt great to be back at the house making progress again. We haven't been out there as much as we would like to be because our daily lives have been consuming all of our time lately. I was starting to forget what the house even looked like, so I was really itching to get back out there! Anyways, here are some updated photos!

View from bottom of stairs looking up.

Upstairs. It looks way more complicated than it really is - once we take out the 2x4 framing it will just be a big open room like downstairs. They had quite the arrangement of rooms in this small house!

Another upstairs view. Metal pipe is a stove vent that will be torn out. To the left is a log wall, if you look closely you can see that some of the chinking has chipped out and you can see the wood chunks they used to fill space between the logs before chinking them 100+ years ago.

View of the upstairs ceiling torn out with beams exposed.

We have the whole house down to logs now, so all that is left of the demo is taking out the 2x4 wall framing and then ripping out the damaged plaster in the non-log section of the house. We're getting there...   :-)

VIIX

Yes!! Finally some progress on the house to share. We have all of the rooms in the cabin mostly torn down to logs now. The house is starting to look like it did 130 years ago and I could not be more excited. This is the stuff I live for - uncovering massive chestnut logs, finding things hidden in the walls, deciphering the roman numerals carved into the beams - it all feels like a big treasure hunt and in the end I will actually get to live in this awesome historic structure!

Downstairs (view #1)

Downstairs (view #2)

Downstairs (view #3)

View from upstairs looking into the space where the main staircase and attic staircase meet

A closer look. The old plaster below the attic staircase was perfectly preserved. The rest of the plaster in the house was crumbling away so we had to tear it out

Upstairs spare room. There were 3 bedrooms and a bathroom upstairs

Jeremy tearing out old lathe & plaster in a bedroom upstairs

View from in the small spare room into the bathroom

View from small spare room into second bedroom

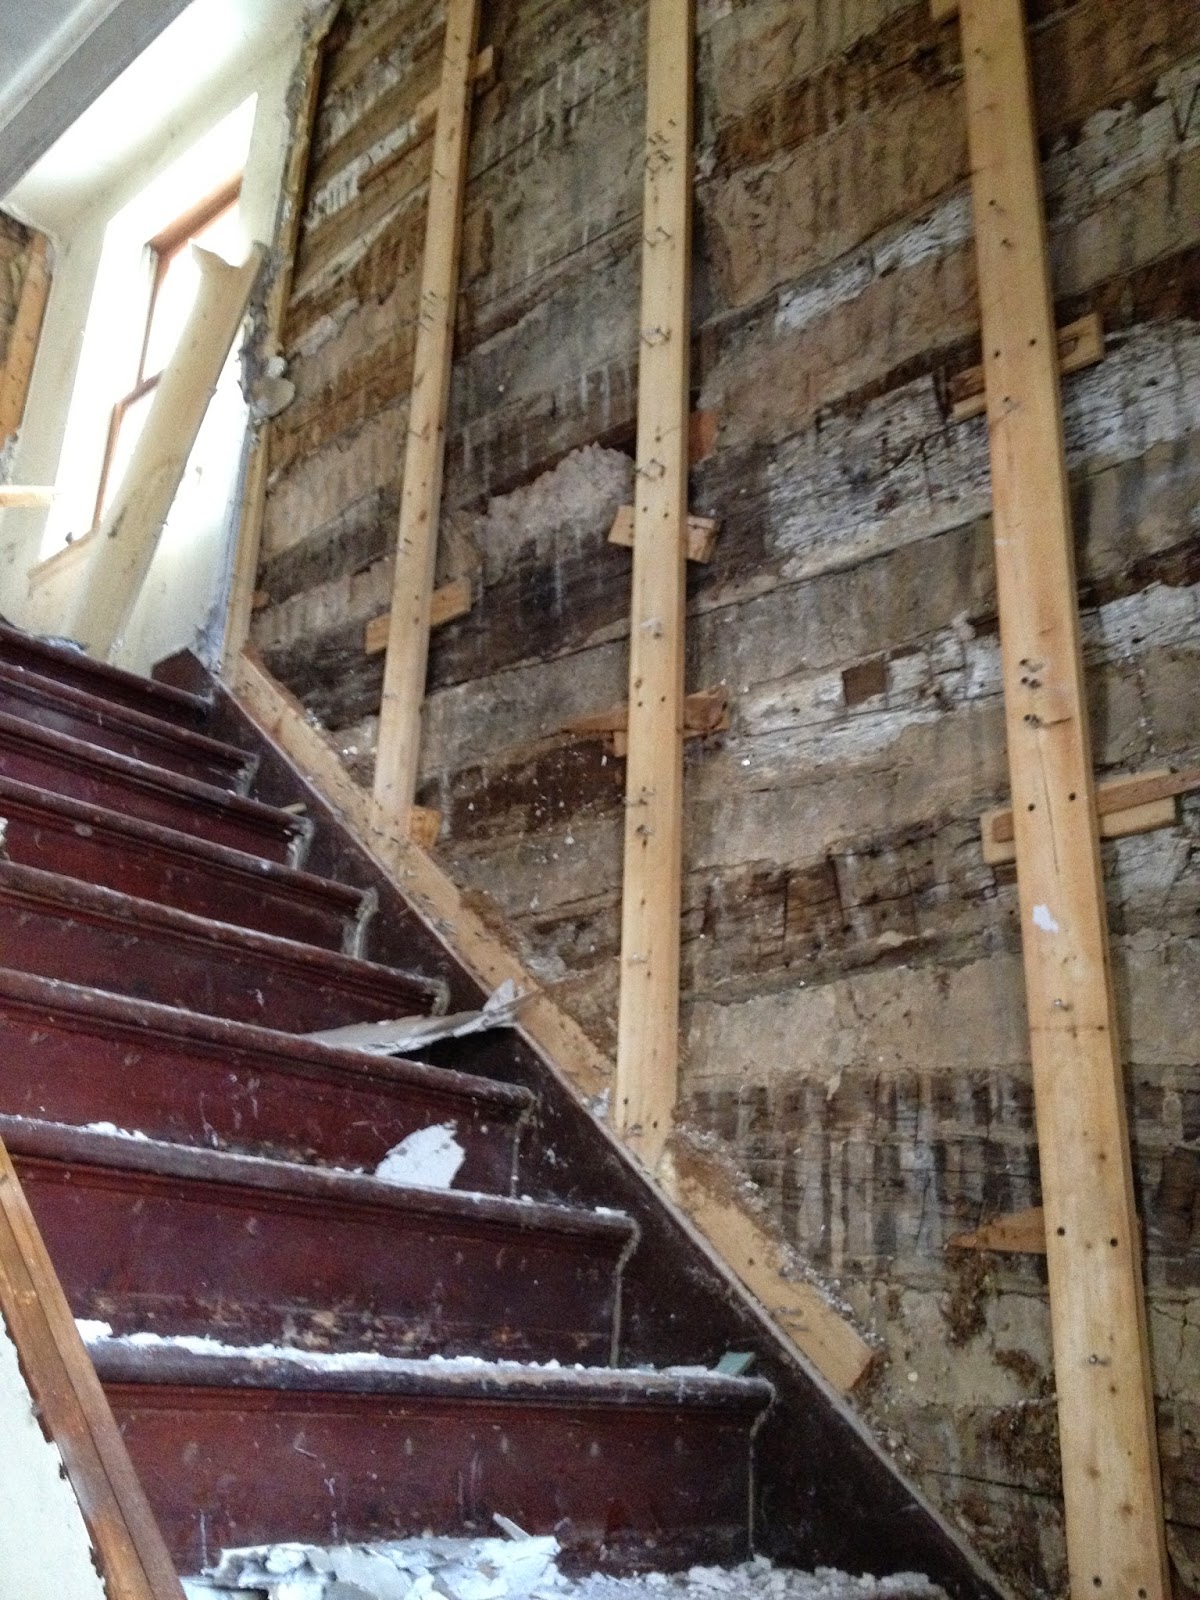
Main staircase and beautiful wall of logs

Roman numerals carved into the logs upstairs

More roman numerals

I am still trying to figure out what the purpose of the roman numeral carvings is. I have read that matching "carpenters marks" were used to mark each end of the log so that when raised the correct ends were joined together. However, the etchings I found are in the middle of the logs, so they may mean something else entirely.

I also have read in some log house books that carvings like this are a sure sign that the house has been disassembled, moved and reconstructed at some time. If this is true, the logs may be much older than I predicted (~1880s). I have found dendrochronology labs that I can send a sample of the log and get age tested, so I may do that to get a more accurate build date for the cabin.

The more I uncover, the more I wonder why this house's previous inhabitants went through such lengths to modify and cover it's natural beauty and charm. It is humbling to stand inside a structure that has been here on earth more than five times the length that than I have been, and feel it is my responsibility to preserve the history that has been created here.

Demo

It has been a while since my last post, so I figured I'd share a couple of updates and photos. Not a lot has been going on as of late, other than starting to demo the inside of the cabin. So far we have one room done.

Lower level demo. Sorry for terrible cell phone quality photo!

Since ripping out the drywall on the ceiling we have learned that the upper floor joists are mostly rotten because the previous owner failed to fix leaky pipes from the upstairs bathroom. Some of the joists are even cut through as much as 75% to make room for bathroom piping.


View of the rotten upper floor joists

We came to the conclusion that the huge steel I-beam that runs through the middle of the room probably was added when plumbing was introduced to the house because they needed to cut through some of the floor logs to make room for piping, thus creating an issue of structural instability. The I-beam hangs very low (Jeremy just fits under it and he is around 5'10") so our plan is to remove all of the old floor joists and the beam.

We have been tossing around the idea of turning the log section of the house into a large one story room because of the limitations with the ceiling height (6'6"-7' at best) and the rotten joists. Possibly a living room like the one pictured below:


But, we will cross that bridge when we get to it. For right now we are just tearing out the house when we have free time and saving some money to get the shop finished up. In order, our plans are:

1) Parge the entire exterior and paint
2) Dig around the foundation, lay drain tile, and re-grade
3) Built the portico for above the door
4) Metal the inside